August 24th, 2016
Cardboard creation: horse costume
Next up in our series of cardboard creations is a simple yet effective horse costume.
This is the perfect activity to keep the kids occupied over the summer holidays. You can help them make it, then watch them gallop round the garden for as many hours as they please.
What you will need:
• A cardboard box, big enough for the child who will wear it
• A cardboard box for the head and tail
• Thick ribbon
• Decorative ribbon or string for the reins
• Craft paint
• Scissors
• Both a red and a black marker pen
• Glue
NB: Parental supervision required when using scissors and glue
Step 1
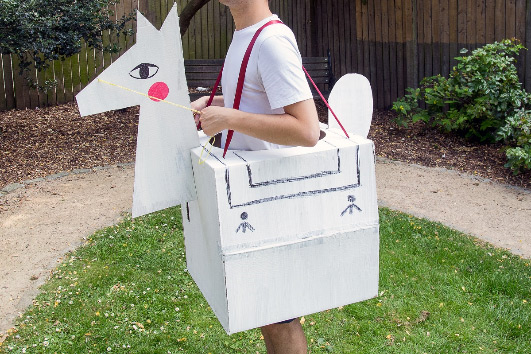
Carefully cut out a circle shaped hole in both sides of one box, which need to be large enough to fit the rider through. Glue down the flaps on the top and bottom to keep them in place. Use the second box to cut out your head and tail, using the below photo as a guide. Cut out slits on the front and the back of the box, and to the head and tail so they can interlock.
Step 2
Cut out four slits in the top of the box, so you can thread the thick ribbon through to act as straps. It’s best to measure the length of the straps with a rider inside the costume.
Step 3
Next up is the really fun bit – time to paint your horse in whatever colours you like. Make sure to give it a pair of eyes and a saddle. Let the paint dry before putting it together.
Step 4
Once dry, the final step is to assemble it. Weave the straps through the slits on the top of the box, securing with a knot underneath the cardboard. Interlock the head and the tail with the body, and glue for extra strength. Add some colourful string round the nose for the reins, and voila! Your very own cardboard horse costume.